
Phishing Campaigns
Managing Phishing Campaigns
You can manage your phishing campaign from within the Campaigns Overview page accessible from under the Phishing Simulations dropdown box. The first time you access the page you will be presented with a chatbot:
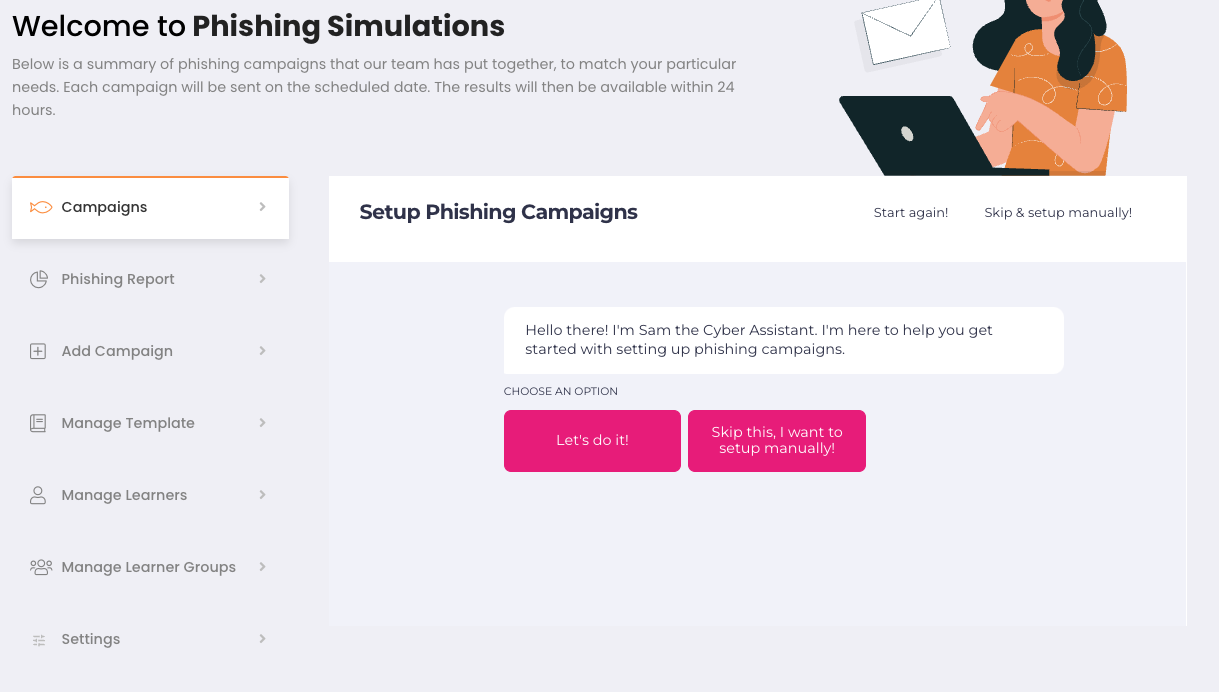
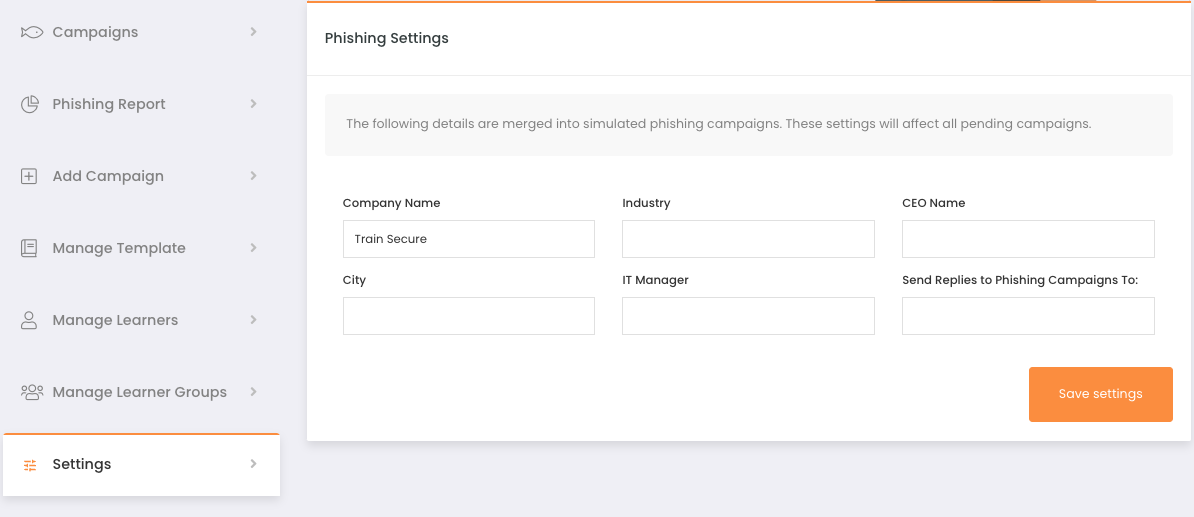
If you choose to complete the chatbot it will auto-generate 12 months worth of simulated spear phishing campaigns using the information you have provided. If you chose to create the campaigns manually please ensure you have entered your companies information within the Settings page:
Creating Campaigns Manually
To create a phishing campaign manually click on the Add Campaign button which will present the below page:
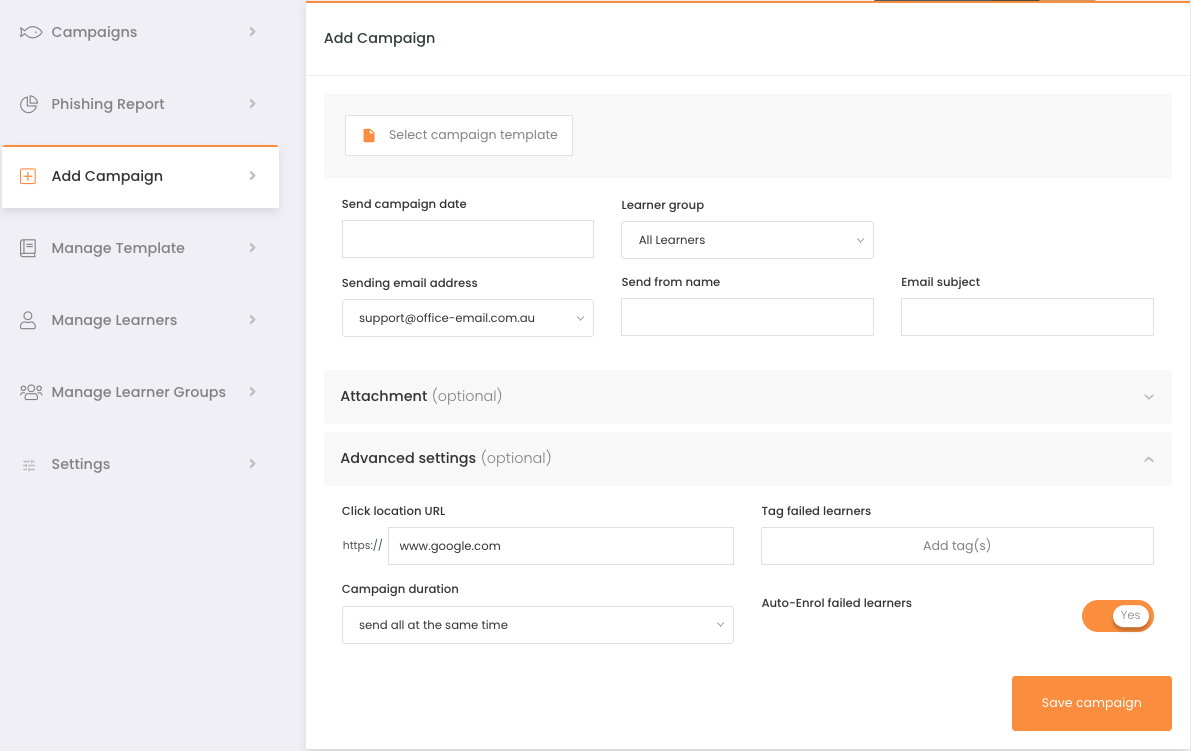
From here you will have the following options:
Select campaign template: This presents a window that allows you to select which phishing template to email out to learners.
Send campaign date: Opens a calendar picker to choose the date and time the phishing email will be sent.
Learner group: Allows for sending the campaign only to specific learner groups.
Sending email address: Presents a dropdown box containing all of the possible sending domains, whatever one you select will be the email address the phishing campaign is sent.
Send from name: This will be the name of the sender shown in the mail client for your learners.
Email subject: This will become the subject line of the email.
Attachment (Optional): Allows you to add an attachment as part of the phishing campaign which contains a tracking link of its own.
Advanced Settings:
Click location URL: By default, this value is google.com and will be the destination a learner is sent over by clicking on a tracking link contained in the phishing email.
Tag failed learners: Allows for tagging learners who fail the simulation with a specific tag.
Campaign duration: By default is set to send all at the same time and allows for having the phishing emails sent over a specific duration of time.
Auto-Enrol failed learners: By default is active and is enabled will automatically enrol failed learners into the failed phishing awareness course.
Please Note: The above settings need to be set while creating the the campaign can cannot be modified after the campaign is set.
Review the phishing simulation schedule
It is important that the campaigns that are going out match the operating environment of the organisation. Review the auto-generated schedule and make any alterations to templates and sending dates.
Please note that phishing campaigns are sent to all learners between 10-11 am on the day the campaign is set.

Sending a test delivery message
After you have confirmation that the sending domains have been whitelisted, it is important that you test the accuracy of the phishing tracking. This would usually only need to be done once per account. Please follow the steps below carefully:
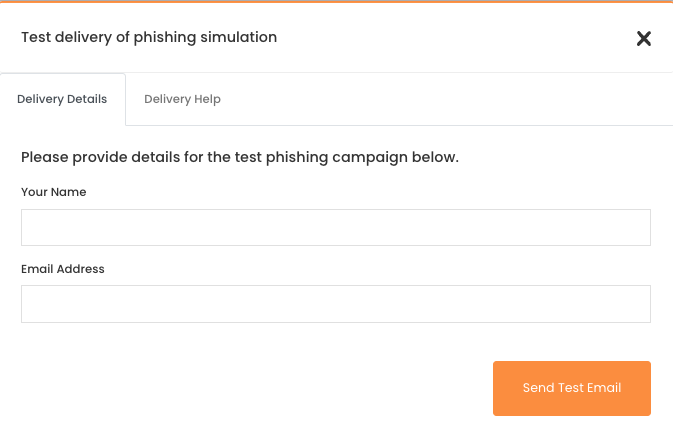
Find a pending campaign and click Send Test Email and enter the email address you wish the test to be sent on the popup.
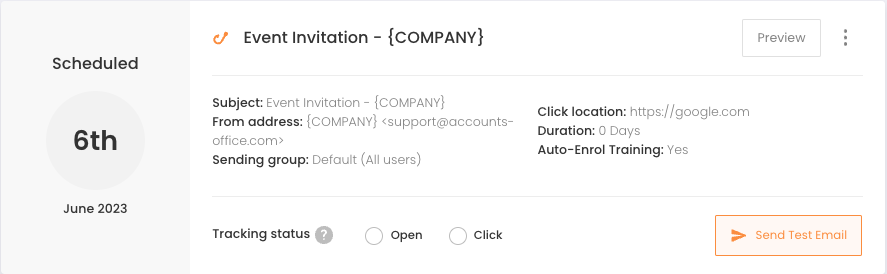
View your email inbox, but do not open the email. Go to the phishing screen to ensure that the open and click tracking is not green.

This confirms that your mail gateway has not sandboxed the phishing campaign, and automatically opened and clicked your links.
NOTE: If your mail gateway is activating the open and click automatically, please contact your IT Manager and they can add an exception to your account.
Now navigate back to your inbox and open the email. Once this is complete you can refresh the page and you should see that the open tracking is working.

Repeat the same process as above but click the link in the email and ensure that the click tracking is working.

Activating Phishing Campaigns
Once you are happy with the phishing campaign schedule you will need to activate the phishing program. This can be achieved by clicking the 'Phishing Status' button.

How do the Phishing Tracking Metrics work?
Open: “Open” represents each instance in which a pixel image embedded in the phishing email is viewed. Many mail clients/mail filters have settings in place to pre-load or safety-check said images, which can skew the data.
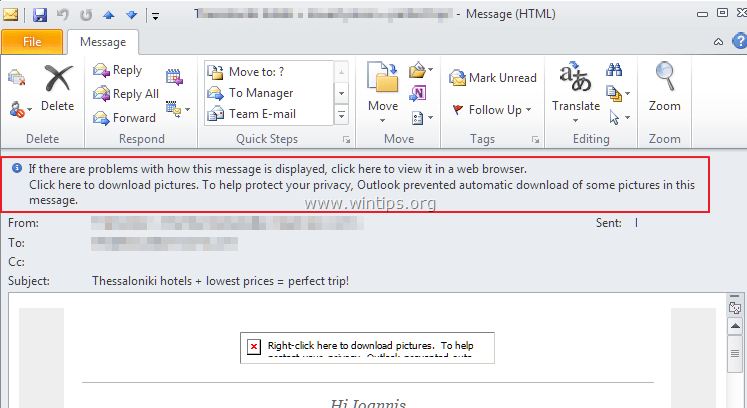
A phishing email will be classified as “Opened” when the aforementioned pixel image is clicked or opened by the receiver. For example, if the below screenshot were actioned and the images within were viewed.
Click: “Click” represents every time the receiver clicks the phishing link found within the email. This is very accurate. Note: this can also be a click from a sandboxing (link) event from a mail client or mail filter. For this reason, it is important to set up whitelisting measures correctly.
Delivered: This refers to the number of email addresses the campaign was sent to.
Note: It is possible to have 0 “open” results while having multiple “clicks” reported. In this case, the mail client has not downloaded the tracking pixel, but the recipient has clicked the link!
Modifying and Creating Phishing Templates
Creating custom phishing templates allows you to customise the phishing experience for your learners by creating harmless template versions of the real phishing attacks that are currently targeting the organisation.
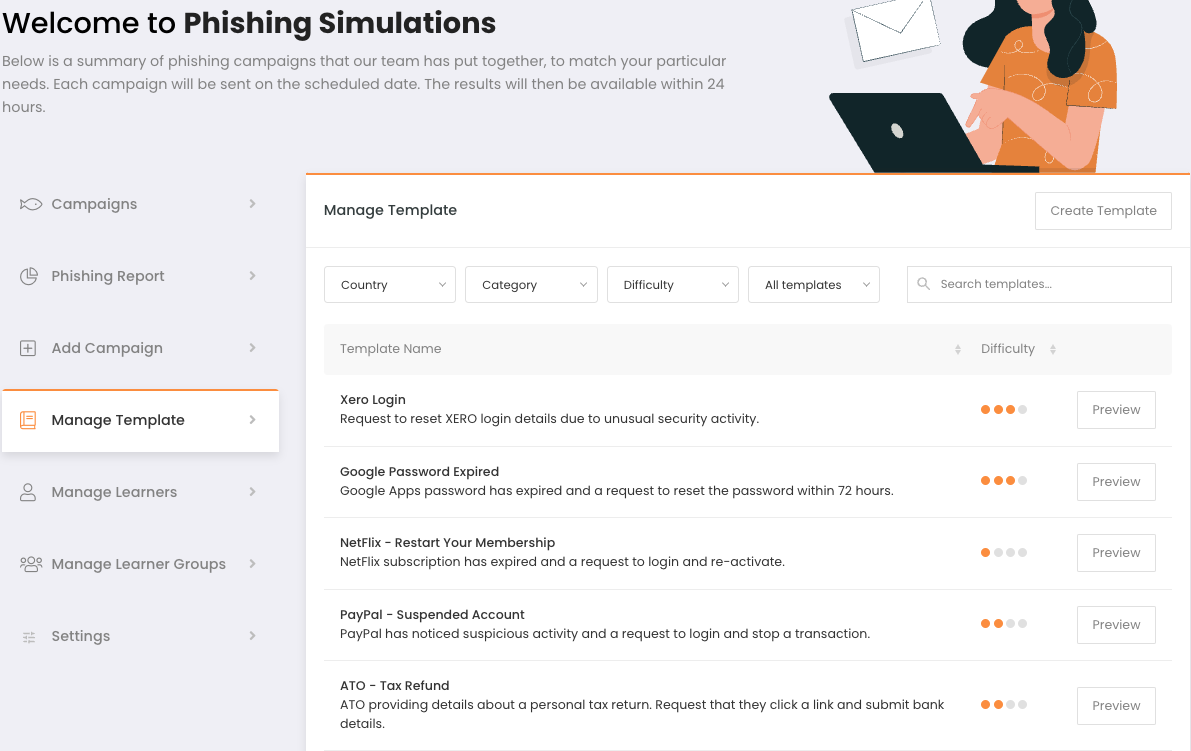
You can create Phishing Templates from your Partner Portal and share the Template with all of your sub-clients by Navigating to Phishing Simulations Dropdown → Manage Templates → Create Template:
Click on Create Template → Import Existing Template which will allow you to select a system template that can be edited:
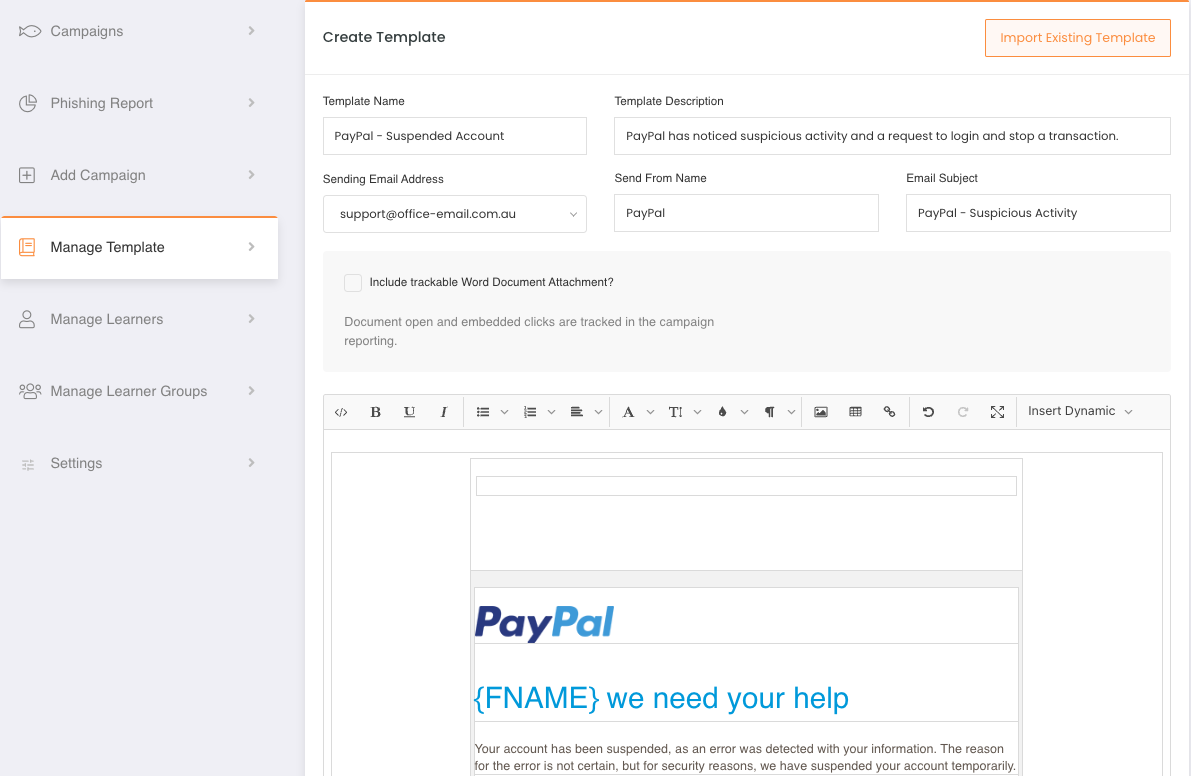
Template Name field is used to identify the template.
Template Description field states what the phishing template content is.
Sending Email Address drop-down allows you to pick the email address the template will be sent.
Send From Name will appear as the From field on most mail clients.
Email Subject is the subject line of the email for the template.
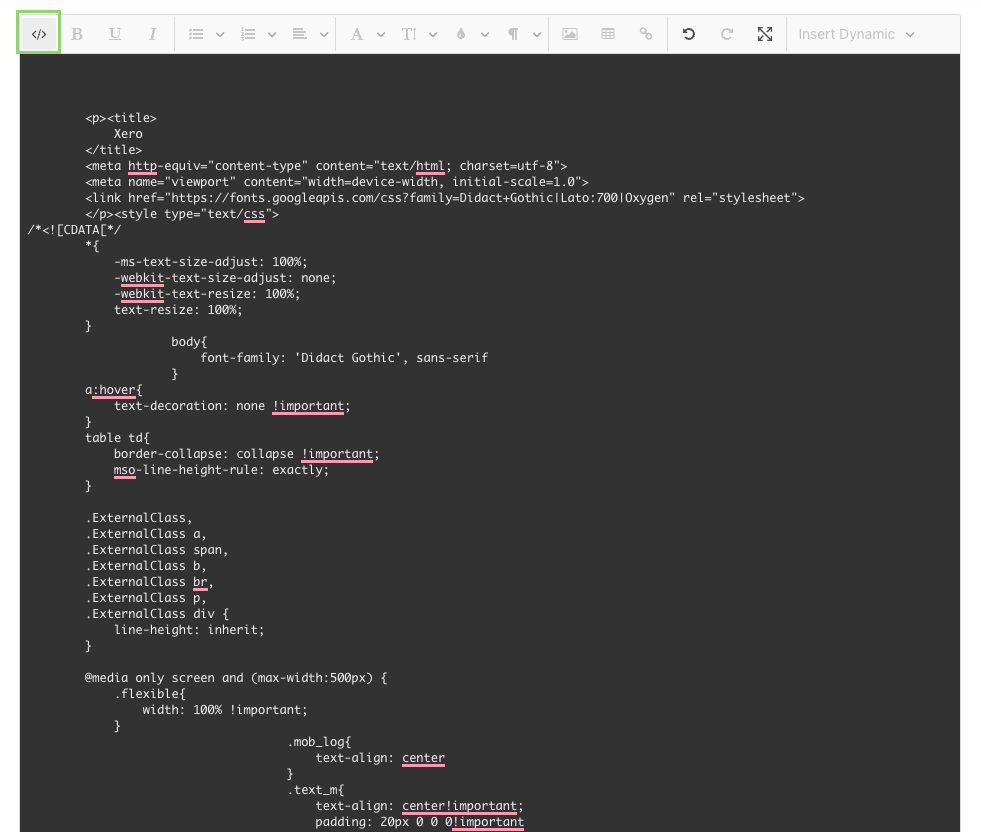
It is also possible to edit the underlying HTML/Scoure Code for the template email by clicking on the Source Code button:
Dynamic Content
You also have the following Dynamic Content tags available to you for creating phishing templates:
Phishing Templates
‘Company Name’ => '{COMPANY}'
‘Clients Industry' => '{INDUSTRY}’
‘Clients CEO’ => ‘{CEO}’
‘Client Location’ => ‘{LOCATION}’
‘Clients IT Manager Name’ => ‘{IT}’
‘Full Address’ => ‘{ADDRESS}’
‘Short Date’ => ‘{DATE}’
‘Short Date and Time’ => ‘{DATETIME}’
‘Long Date Formate’ => ‘{DATELONG}’
‘Learner Full Name’ => ‘{FULLNAME}’
‘Learners First Name’ => ‘{FNAME}’
You can modify what the first five tags value resolves to by navigating to the Phishing Settings page by: Navigating to Phishing Simulations Dropdown → Campaign Overview → Settings